Hey all. As this post airs, the hubby and I are on our way to Maine for a wedding.
For this particular occasion, I decided to give this card (posted previously HERE).
We also had a gift card and holder to go along with it. I wanted something a bit more package-like than a gift bag so I searched around to see if I had a gift box I could recycle. While digging around, I found this sweet little pillow box...
Cute, right? But, sadly, it was a bit dinged up. A little light bulb came on and I thought, "Hey, I think I can make one of these!". Here are the fruits of that labor;
The basic box was really pretty easy to make so I thought I'd share my process with y'all :) It went a little like this (ack, this is a bit scary!!!);
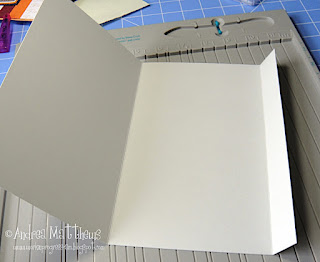
I started with a sheet of soft stone card stock from PTI. I scored at 5" and 10".
Then folded...
I made a quick little template for the ends. I started with a 5"x 1.25" rectangle of card stock.
Being the precise person I am, I measured the halfway point and scored to fold... then realized I could have just as easily folded it in half on the long axis... Ha! In any event, fold it in half lengthwise.
Here is is scored and folded length-wise.
Then folded again...
Then drew a little arc with the top of the arc toward the open edges of the fold.
I cut along the arc and unfolded...
...and used the template to create the arcs in the end of my pillow box for closures. I just lined up the top of the template with the top of the card stock and drew a soft line, two on both ends for a total of four.
This is what it looked like after trimming the excess away.
To make the ends fold in, I took my little template and used my embossing tool (you can use any other scoring implement) to score the card stock around the template. I just lined up the template with the previously cut arcs. Make sure the edge of the arc meets the edge of the underlying paper without crossing the creases of the length of the box or your flaps won't close cleanly (in this picture, mine is lined up a little too far toward my embossing tool - see where the right edge crosses the crease of the long edge of the box? I pulled it away from the embossing tool after the photo to get the edge off of the crease before I scored). Hope that bit makes sense (I'm not brave enough to attempt a video yet!).
After that's done, the edges can be gently folded in...
Then add sticky tape (I used Terrifically Tacky tape) to the 1 inch lip (Oh yeah, don't forget to angle the edges of that 1 inch section, again to help the box close and make it look tidy).
Here's the finished box (well, it still needed a bit more work, see below). If you wanted to stamp on it, it would be easiest to do this before assembly :) I didn't need to for this one.
The final box measures 5" wide by about 6.25-6.5" long, so it's pretty roomy.
So that's about it! Please feel free to contact me with any questions is any of this was not completely clear :) It's hard to put into text sometimes. Perhaps I'll be brave enough to make a video sometime, but likely not - LOL!
Thanks so much for stopping by! I appreciate your visits!!!
TTFN,


